
Included Parts and Names
The following items are included in this armor set.
Each part has a specific role in traditional samurai display.
Some models may not include all components.
Yoroi Parts – Short Descriptions
Kuwagata (Helmet crest)
Horn-shaped crest symbolizing courage, light, and divine protection.
Maetate / Ryuzu (Front Ornament / Dragon Head)
Front emblem, often a dragon or deity, symbolizing strength and spirit.
Kuwagata-dai (Crest Base / Holder)
Base that supports and aligns the front ornaments securely.
Mabizashi (Visor)
Brim protecting the face; defines the helmet’s sharp expression.
Menpō (Face mask)
Protects the face; represents courage and determination.
Shinobi-o (Helmet Cord)
Braided cord securing the helmet; represents unity and harmony.
Sode (Shoulder guards)
Plates protecting the shoulders; symbolize balance and strength.
Dō (Cuirass / body armor)
Main body section protecting the torso; the centerpiece of the display.
Tekō (Arm guards)
Protects the forearms and hands, symbolizing skill and readiness in battle.
Yoroibitsu (Armor storage box / display base)
Storage box and display base used to support the armor set.
Kusazuri (Skirt armor / front waist plates)
Plates hanging from the cuirass to protect the waist and upper legs.
Haidate (Thigh guards)
Cloth and plate guards for the thighs, secured in front of the chest.
Suneate (Shin guards)
Protective armor for the shins, displayed with the boots.
Kegutsu (Armored footwear)
Decorative armored boots placed at the front of the chest.
Meifuda (Wooden nameplate)
Wooden plaque inscribed with the artisan’s name or title.

Front and Back of the Armor Chest
Identify the front and back of the armor chest before assembling the display.
Some armor chests used for full armor displays have a clear front and back.
The front usually features decorative metal fittings or a family crest, while the back is plain or has hinges.
If your set does not have a visible difference, either side can face forward when displaying the armor.

Unpack and Check the Contents
Remove each piece from the armor chest and confirm the included parts.
Carefully take out each component — such as the cuirass (dō), helmet (kabuto), face guard (menpō), thigh guards (haidate), and cords — and check that all main parts are included.
Some armor sets may not include every item shown in this guide, as the contents vary depending on the product.

Displaying the Haidate
Position the armor chest and secure the haidate (thigh guards) at the front.
Place the yoroibitsu (armor chest) in position.
Align the center of the haidate with the center of the box, then insert both ends of its straps between the box and the lid as shown.
Close the lid firmly to hold the haidate in place and create a stable base for the display.

Displaying the Haidate
Align and secure the haidate (thigh guards) at the front of the armor chest.
Align the haidate with the center of the armor chest, secure the straps between the box and lid, and adjust the balance so both sides hang evenly.

Displaying the Dō (Cuirass)
Set the support pole (shinboku) and hang the cuirass (dō).
Set up the shinboku (support pole) on top of the armor chest.
Align the left and right sides with the center, and position the pole slightly toward the front rather than directly in the middle.
Hang the dō (cuirass) over the pole and shape it so that the “elbows” spread slightly outward for a natural, elegant form.
If the sides are too loose and the elbows droop straight down, the display will appear flat and lifeless.

Hanging the Menpō (Face Mask)
Hang the mask cord on the groove at the top of the support pole.
Place the menpō (face guard) by hanging its cord securely in the groove at the top of the shinboku (support pole).
Make sure it is centered and faces forward evenly.
This prepares the position for placing the kabuto (helmet) later.
(Some sets do not include a menpō.)

Adjusting the Menpō Position
Adjust the height and angle of the menpō for the best balance with the helmet.
After hanging the menpō, place the kabuto (helmet) temporarily to check the balance.
The mabizashi (visor) of the helmet should slightly overlap the upper edge of the menpō for a natural and dignified look.
If the position is off, adjust the cord length by holding the knot and gently pulling the cord to tighten or loosen it.

Inserting the Kuwagata
Insert the kuwagata (horn-shaped crests) into the metal holders on both sides of the helmet.
Align each kuwagata carefully and insert it straight into the side holders of the kabuto.
Make sure the tips point outward for the correct orientation.
Some kuwagata have a distinct front and back—check the decorative side faces forward before inserting.
For best results, wear thin gloves to avoid leaving fingerprints on the polished surface.

Adjusting the Balance
Ensure both kuwagata are symmetrical and evenly angled.
After inserting both crests, step back and check the alignment from the front.
Adjust the angle and spacing so that the kuwagata appear symmetrical and balanced when viewed head-on.
This gives the helmet a dignified and harmonious appearance.

Displaying the Kabuto (Helmet)
Place the helmet on the support pole and adjust the overall balance.
Place the kabuto (helmet) on the top board of the shinboku (support pole), adjusting its angle slightly forward, backward, and side to side until the form appears balanced and dignified.
If the shinobi-o (decorative cords) are creased, protect the dō (cuirass) with a soft towel and lightly mist the cords with water to help them relax back into shape.

Inserting the Suneate into the Kegutsu
Insert each suneate (shin guard) into the kegutsu (armored shoes).
Insert the suneate (shin guards) into the kegutsu (armored shoes).
The curved edge should face outward, and any crest should face forward for a balanced look.

Positioning the Suneate and Kegutsu
Place the suneate and kegutsu neatly in front of the armor chest.
After inserting both pieces, place them side by side in front of the armor chest, leaving a small space so the decorative metal fittings on the box remain visible.
Check that both sides are symmetrical and evenly spaced.
Finally, step back and view the entire display to confirm the overall balance.
(Some sets may not include suneate or kegutsu.)

Final Adjustment and Nameplate Placement
Make final adjustments and place the meifuda (nameplate).
Step back and check the overall balance of the display.
Ensure the kabuto, dō, and haidate are aligned symmetrically, and that cords and plates hang naturally.
If needed, make small adjustments to correct any tilt or uneven spacing.
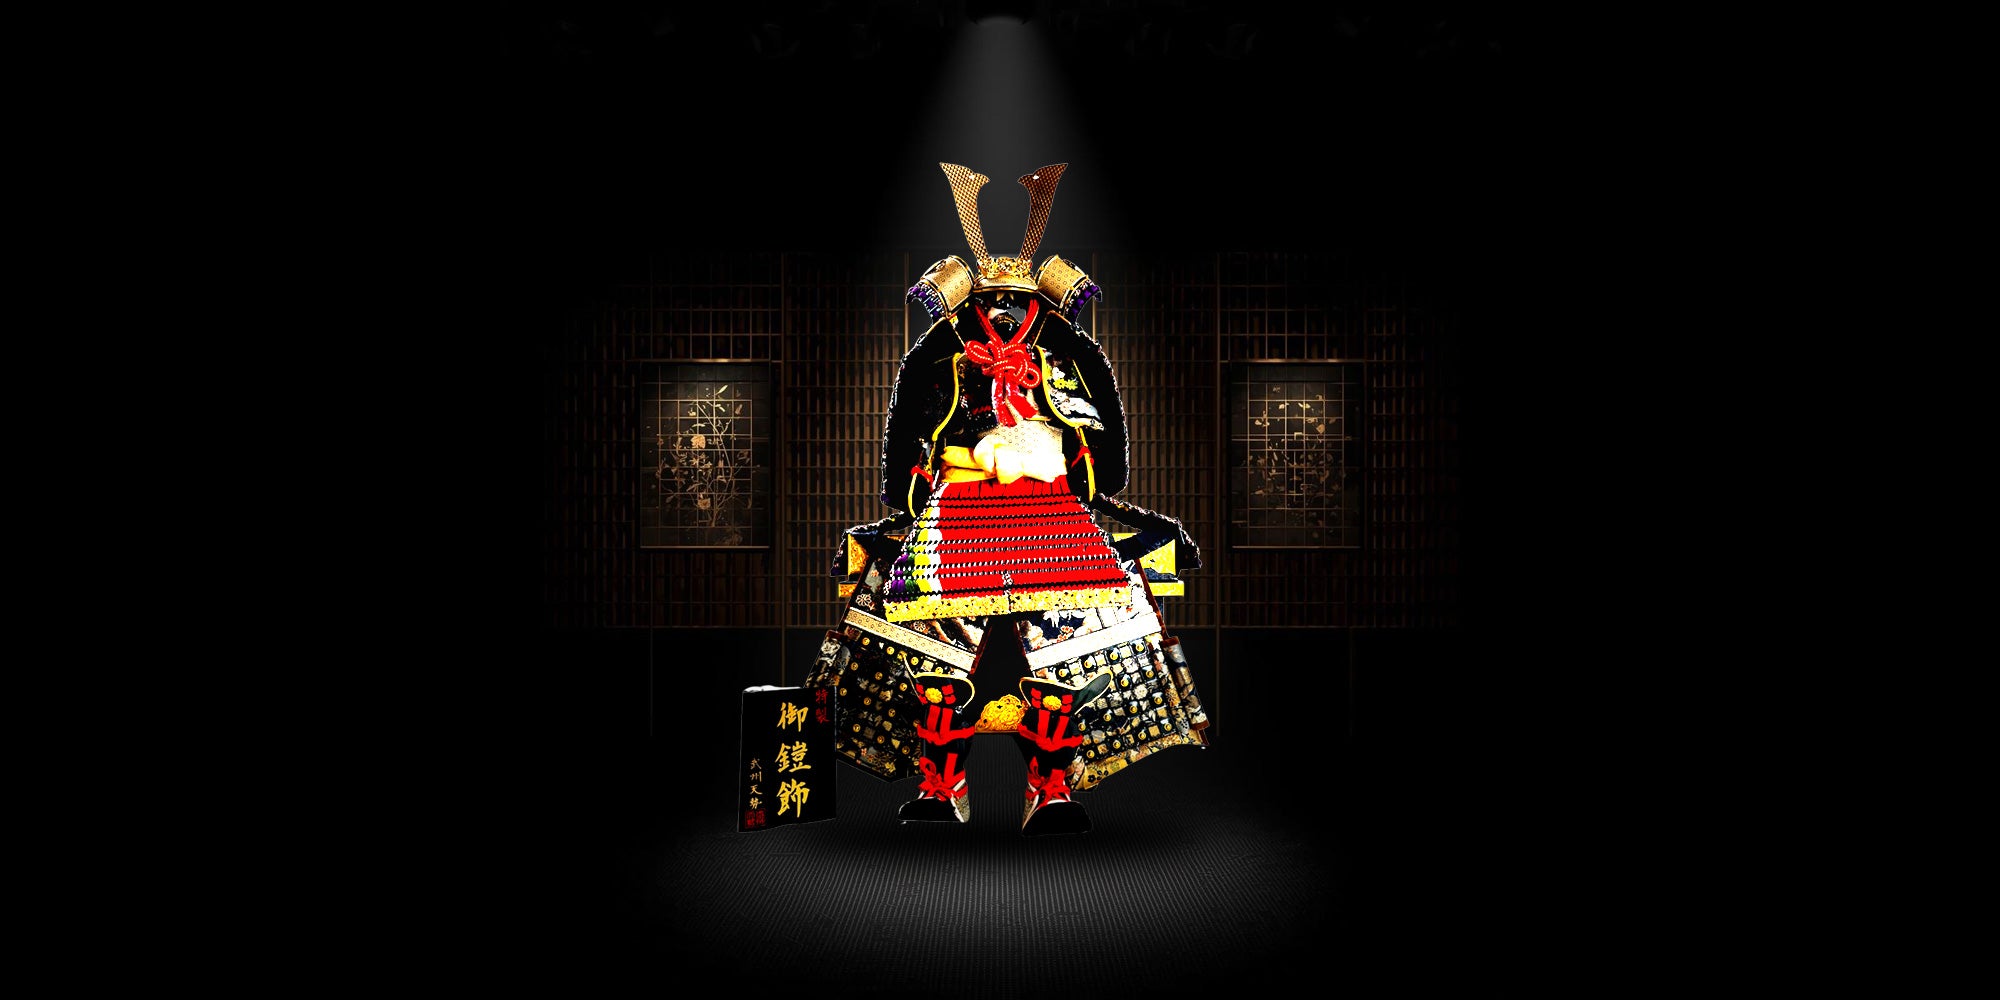
Finally, place the meifuda (wooden nameplate) on the front-right side of the yoroibitsu (armor chest).
This plaque often bears the artisan’s name or an auspicious inscription, completing the display with elegance and respect.
⚠️ Notes for Wearable Armor and Helmets
If the armor or helmet is designed to be wearable, please observe the following precautions:
• Although sized for children, do not force it to fit if the size is not appropriate.
• Ensure the wearer’s body can safely support the weight before putting it on.
• Metal components are used—take care to avoid injury during attachment and removal.
• Do not wear for extended periods of time.
• Use only in a safe, open area, free from surrounding hazards or obstacles.
🛡️ Additional Notes for Display Armor
• Do not sit, stand, or place heavy objects on the armor chest (yoroibitsu), as it may cause damage.
• Handle the armor gently, especially when adjusting metal fittings, cords, or decorative parts.
• Some sets may not include certain components, such as the menpō (face guard), meifuda (nameplate), or other accessories, depending on the product.
• Avoid exposure to direct sunlight, moisture, or high humidity, which may affect the materials or colors.